This post is a continuation of the “Bluetooth, Beacons & Titanium Mobile Apps” series. For more details and to learn more about Bluetooth and mobile apps, you can start at the beginning of the series and read Understanding Bluetooth for Android, iOS, & Titanium. The Bluetooth Classic protocol is the original Bluetooth protocol and is still available as part of the BT4.1 specification. Read Part 1 of this series to better understand the differences between the BT protocols vs versions of the specification.
This part of the series walks through building a simple example of Bluetooth Classic app in Titanium for iOS and Android, the app demonstrates printing to a Zebra label printer.
Printing to a Zebra Printer
This example demonstrates how to print to a Zebra printer via Classic Bluetooth on both iOS and Android. The native API for Classic Bluetooth on the two platforms are significantly different, so we will use two different modules:
- The Logical Labs External Accessories Module for iOS
- The Logical Labs Bluetooth Classic Android Module for Android
Steps of developing this example app:
- Start with a single page Alloy app from the Titanium Studio template
- Install the Logical Labs External Accessories module for iOS and the Logical Labs Classic Bluetooth module for Android and add them to the app
- Add the UI elements
- Display available devices
- Connecting/disconnecting a selected device
- Print a line of text
Each of these steps is represented by a commit in this GitHub repo, which contains all of the code of this example. The most interesting parts of each commit are shown in subsequent sections.
Displaying Available Devices
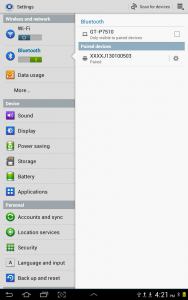
For sake of simplicity, the app will assume that Bluetooth is turned on and it will only display the Bluetooth devices that are already paired with the mobile device. Use the mobile device’s Setting app to establish the pairing. The following screenshots show the desired starting point for the app:
On iOS, these devices can be found in the External Accessories module’s connectedAccessories property:
PROTOCOL_STRING = 'com.zebra.rawport';

exports.getDeviceList = function() {
    var result, accessories;

    result = [];

    accessories =  ExternalAccessories.connectedAccessories;

    accessories.forEach(function(accessory) {
        if (accessory.protocolStrings.indexOf(PROTOCOL_STRING) > -1) {
            result.push({
                name: accessory.name,
                device: accessory
            });
        }
    });
    return result;
};
On Android, these devices can be found in the Bluetooth module’s pairedDevices property:
exports.getDeviceList = function() {
    var result, devices;

    result = [];

    devices = Bluetooth.pairedDevices;
    devices.forEach(function(device) {
            result.push({
                name: device.name,
                device: device
            });
        });
    return result;
};
Both of these module properties reference arrays of objects, each object representing a remote device.
Connecting/Disconnecting Selected Device
On iOS, the connection is established by creating a session to the accessory (the printer):
session = accessory.openSession({
    protocol: PROTOCOL_STRING
});
The PROTOCOL_STRING identifies the protocol used for the connection. In our case, the protocol is called com.zebra.rawport. It is critical that this protocol string is also listed in the app’s plist file. For Titanium apps, the tiapp.xml file contains the options to be added to the plist file:
<ios>
    <plist>
        <dict>
        [...]
            <key>UISupportedExternalAccessoryProtocols</key>
            <array>
                <string>com.zebra.rawport</string>
            </array>
        </dict>
    </plist>
</ios>
On Android, the connection is established through a socket:
exports.connect = function(device) {
    clientSocket = device.createSocket({
        uuid: SPP_UUID,
        secure: true
    });
    clientSocket.addEventListener('connected', socketConnected);
    clientSocket.addEventListener('disconnected', socketDisconnected);
    clientSocket.addEventListener('error', socketError);

    clientSocket.connect();
};
Print a Line of Text
On iOS, the text to be printed is written to the session:
exports.print = function(text) {
    [...]
    session.write({
        data: Ti.createBuffer({
            value: text
        })
    });
    [...]
};
On Android, the socket plays the equivalent role:
exports.print = function(text) {
    [...]
    clientSocket.write(
        Ti.createBuffer({
            value: text
        })
    );
    [...]
};


Recent Comments